Jenkins setup (CI/CD)
Setting up Jenkins
1. Installation steps
1.1. Install java
Commands to install java
sudo add-apt-repository ppa:openjdk-r/ppasudo apt-get updatesudo apt-get install -y fontconfig openjdk-11-jre openjdk-11-jdk1.2. Install maven (On Jenkins machine)
Commands to install maven
cd /tmp ; sudo wget https://dlcdn.apache.org/maven/maven-3/3.9.4/binaries/apache-maven-3.9.4-bin.tar.gzcd /tmp ; sudo tar -xzf apache-maven-3.9.4-bin.tar.gz -C /opt/1.3. Install jenkins
Commands to install jenkins
curl -fsSL https://pkg.jenkins.io/debian-stable/jenkins.io-2023.key | sudo tee /usr/share/keyrings/jenkins-keyring.asc > /dev/nullecho deb [signed-by=/usr/share/keyrings/jenkins-keyring.asc] https://pkg.jenkins.io/debian-stable binary/ | sudo tee /etc/apt/sources.list.d/jenkins.list > /dev/nullsudo apt-get updatesudo apt-get install jenkins2. Initial configuration
-
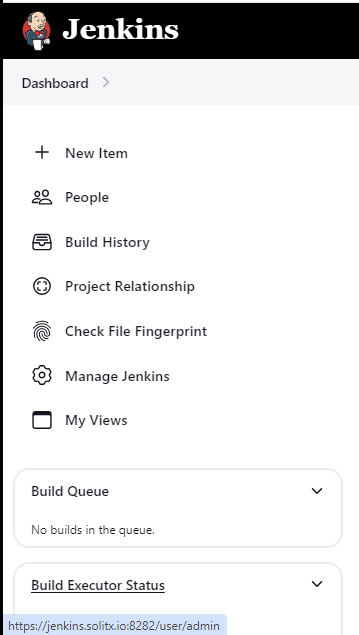
Go to Jenkins console, using this URL http://serverIP:8080/ .
-
Sign in with required credentials.
-
After signing in, from the dashboard go to Manage Jenkins tab on the left to start the configuration.
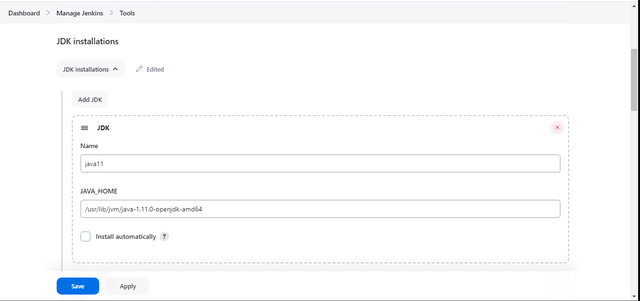
2.1. Steps for java configuration
Manage Jenkins → Tools → JDK installations → Add JDK Name: java11 (can be any string) JAVA_HOME: /path/to/javahome (ex: /usr/lib/jvm/java)
|
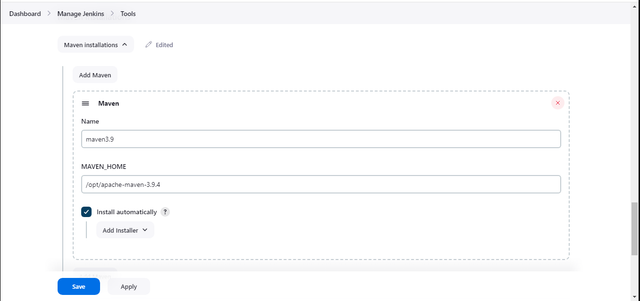
2.2. Steps for maven configuration
Manage Jenkins → Tools → Maven installations → Add Maven Name: maven3.6 (can be any string) MAVEN_HOME: /path/to/mavenhome (/opt/maven)
|
Based on the requirements, multiple maven versions can also be configured. |
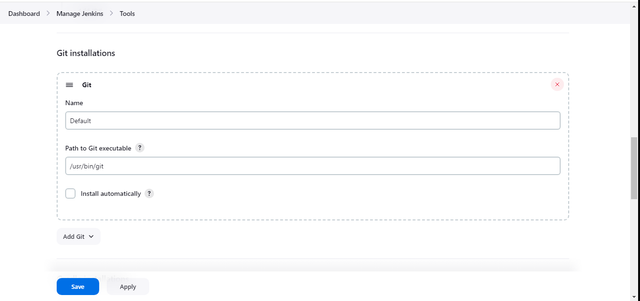
2.3. Steps for Git configuration
Manage Jenkins → Tools → Git installations → Add Git Name: git (can be any string) MAVEN_HOME: /path/to/mavenhome (/usr/bin/git)
|
Based on the requirements, multiple Git versions can also be configured. |
2.4. Required plugins
-
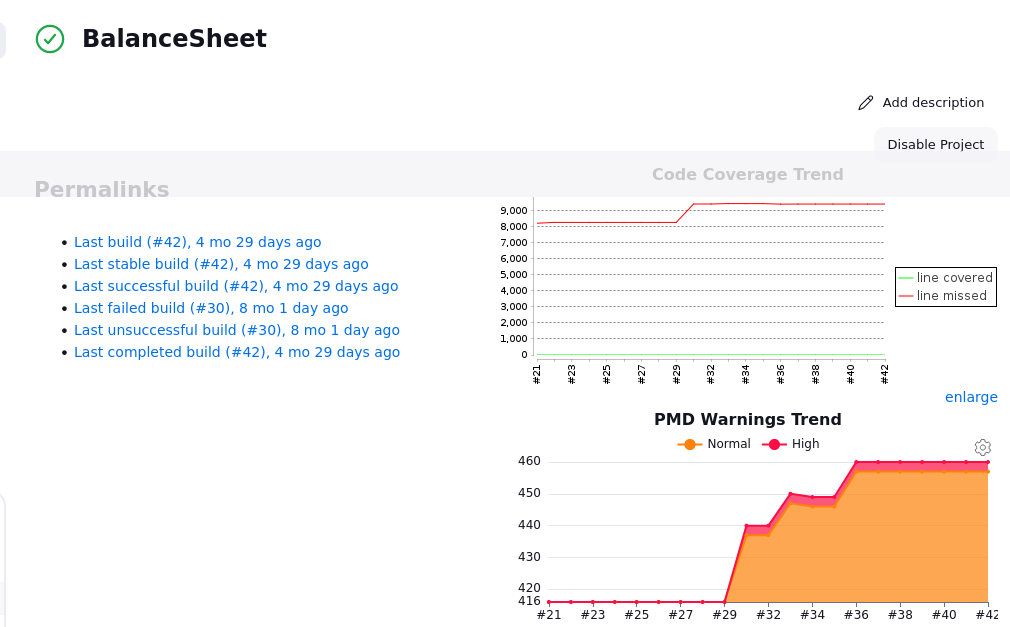
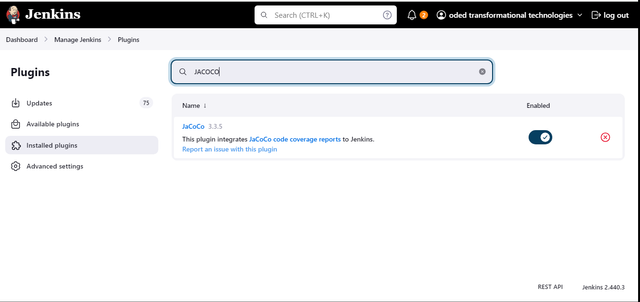
The JaCoCo plugin generates code coverage reports by processing the .xml files generated by the Jenkins.
-
Steps to install JaCoCo plugin
-
Manage Jenkins -→ Plugins-→ Available plugins -→ JaCoCo.
-
After installing from the 'Available plugins' section, verify the installation by checking the 'Installed plugins' tab in the 'Plugins' panel on the left side.
-
-
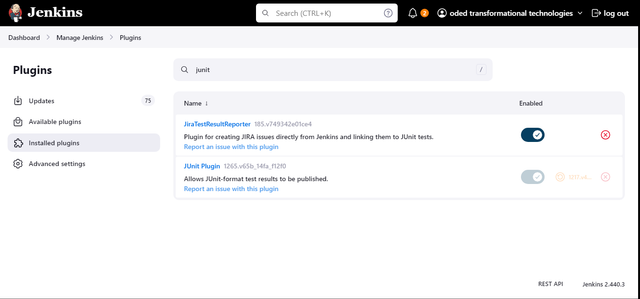
The JUnit plugin in Jenkins publishes and visualizes JUnit test results, providing detailed reports and trend analysis to track test performance and failures over time.
-
Steps to install JUnit plugin
-
Manage Jenkins → Plugins→ Available plugins → JUnit.
-
After installing from the 'Available plugins' section, verify the installation by checking the 'Installed plugins' tab in the 'Plugins' panel on the left side.
-
-
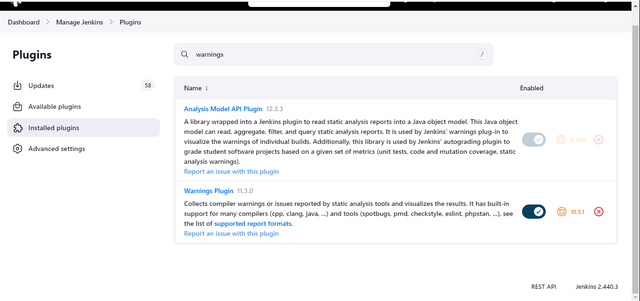
The Warnings next generation plugin in Jenkins collects and visualizes compiler warnings, static analysis warnings, and other warnings from various tools to provide a detailed report and trend analysis of code quality issues.
-
Steps to install warning next generation plugin
-
Manage Jenkins → Plugins → Available plugins → Warnings.
-
After installing from the 'Available plugins' section, verify the installation by checking the 'Installed plugins' tab in the 'Plugins' panel on the left side.
-
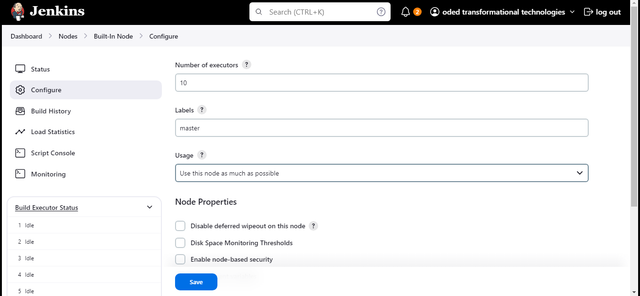
3. Build executors
-
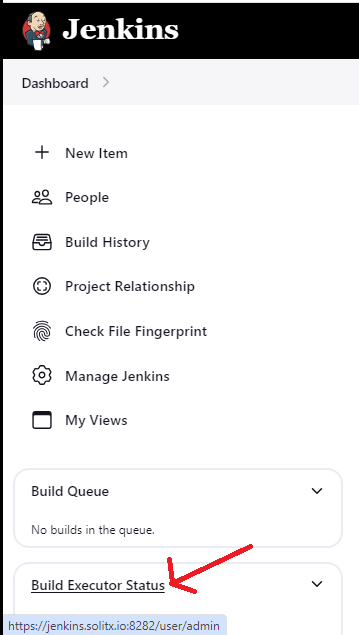
In Jenkins, an executor is a computational resource allocated to run a build. By default, each Jenkins instance is configured with a single executor. However, for better resource utilization and to handle multiple jobs concurrently, you might need to configure additional executors or manage their settings.
Accessing the executor configuration
-
Dashboard → Build executor status.
-
From the required list of nodes, select the gear icon of the node in which the build is going to be configured.
-
In the “Number of executors” tab, enter the number of concurrent builds that this node can run.
-
Labels can be used to assign attributes to your nodes. This can be useful for scheduling jobs to run on specific nodes.
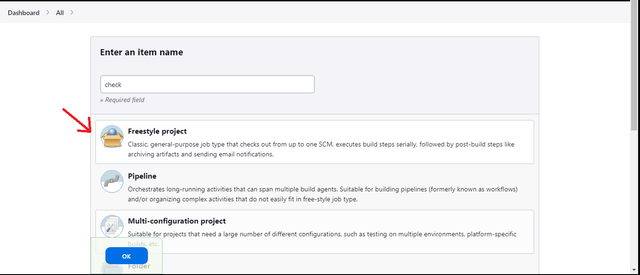
4. Jenkins new job creation
-
To create a new jenkins job go to
-
Dashboard → New Item
-
Enter the name of the job in the
Enter an item namesection. -
Select
Freestyle projectclickOK.
-
5. Configuring new job
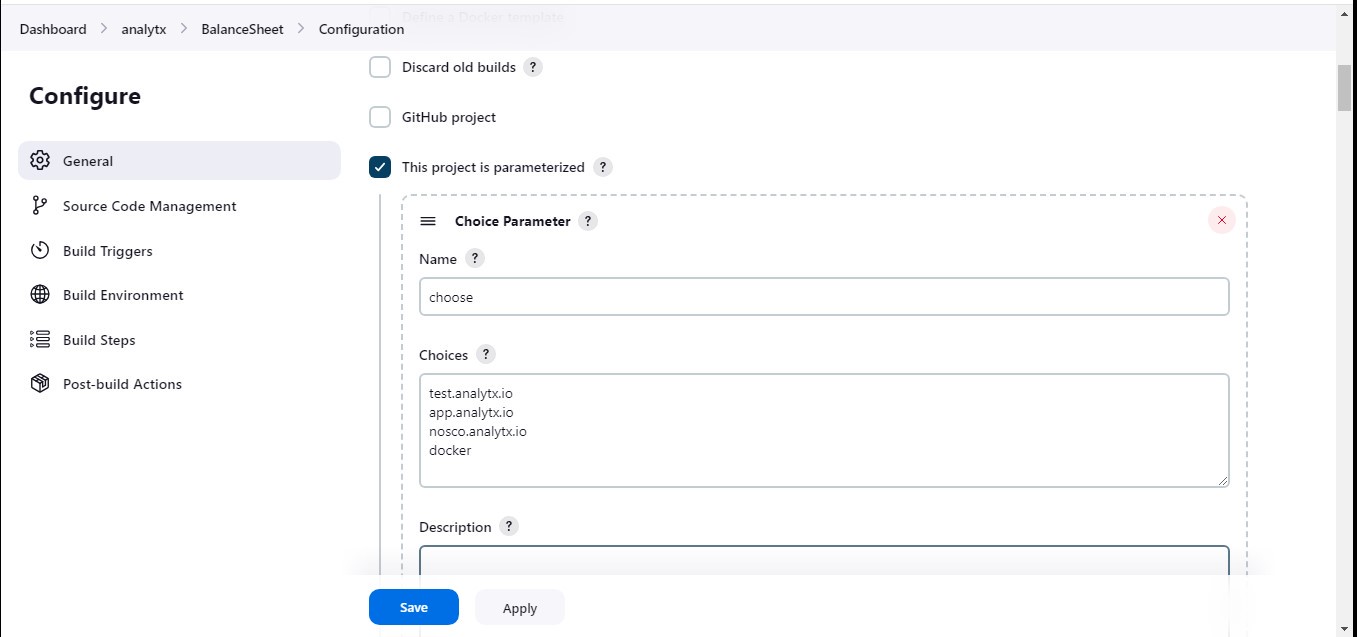
5.1. General
-
In the left-hand sidebar menu, click on
Configure. -
Under the
Generalsection, select theThis project is parameterizedoption.
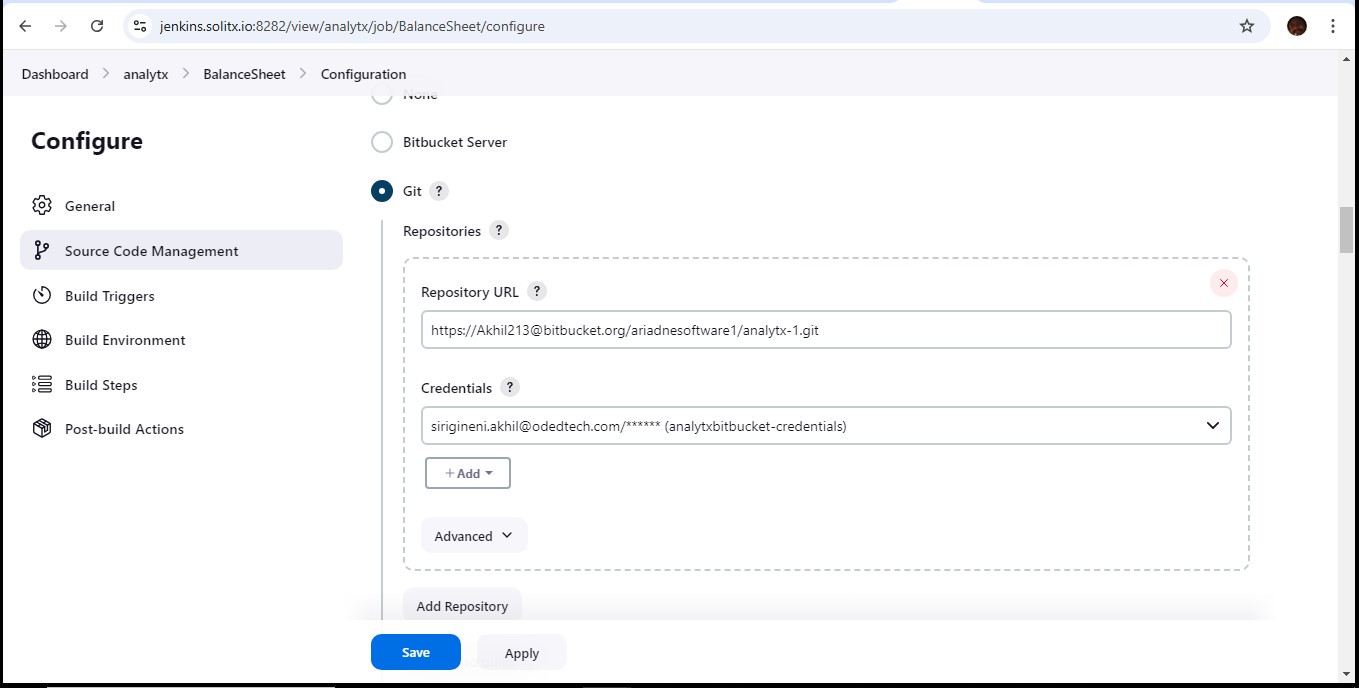
5.2. Source code management for Bitbucket server
-
In the left-hand sidebar menu, click on
Configure. -
Under the
Source Code Managementsection, select theGitoption from the dropdown menu. -
In the
Repository URLfield, enter the URL of Bitbucket Server repository. -
For authentication, enter the credentials in the
Credentialsfield. Create or choose from existing credentials by clicking onCredentialsand selecting eitherAddorExisting Credentials. -
Click
Saveto save the configuration.
-
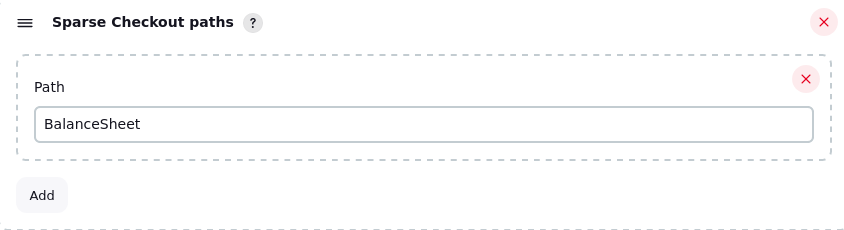
Sparse checkout allows to selectively clone only specific directories or files from the Git repository. This can be useful for reducing disk space usage and build times, especially for large repositories where there is only a need to build a specific portion of the code.
-
Steps to enable sparse checkout
-
Click on the
Additional Behaviorssection. -
Click on
Addand selectSparse Checkout paths. -
In the text field, enter the path(s) to the directory or file that is to be checked out.
-
Click
Saveto save the configuration.
-
5.3. Build environment
-
Secret text credentials are a way to securely store sensitive information, such as API tokens, passwords, or SSH keys, in Jenkins. This helps to avoid hardcoding sensitive information into your Jenkins jobs, which can improve security and make your jobs more portable.
-
Steps to create secret text credentials
-
Scroll down to the
Build Environmentsection. -
Tick the checkbox
Use secret text(s) or file(s). -
Click
Addunder the Secret text section. -
In the
Variablefield, enter a name for the environment variable that will store the secret text. This name will be used to reference the secret text in the build scripts. -
Under
Credentials, select the secret text credential that is to be used. A new secret text can be created by going toCredentials > System > Global credentials(or appropriate scope) and clickingAdd Credentials. Then selectSecret textfrom the dropdown menu. -
Click
Saveto save your configuration.
-
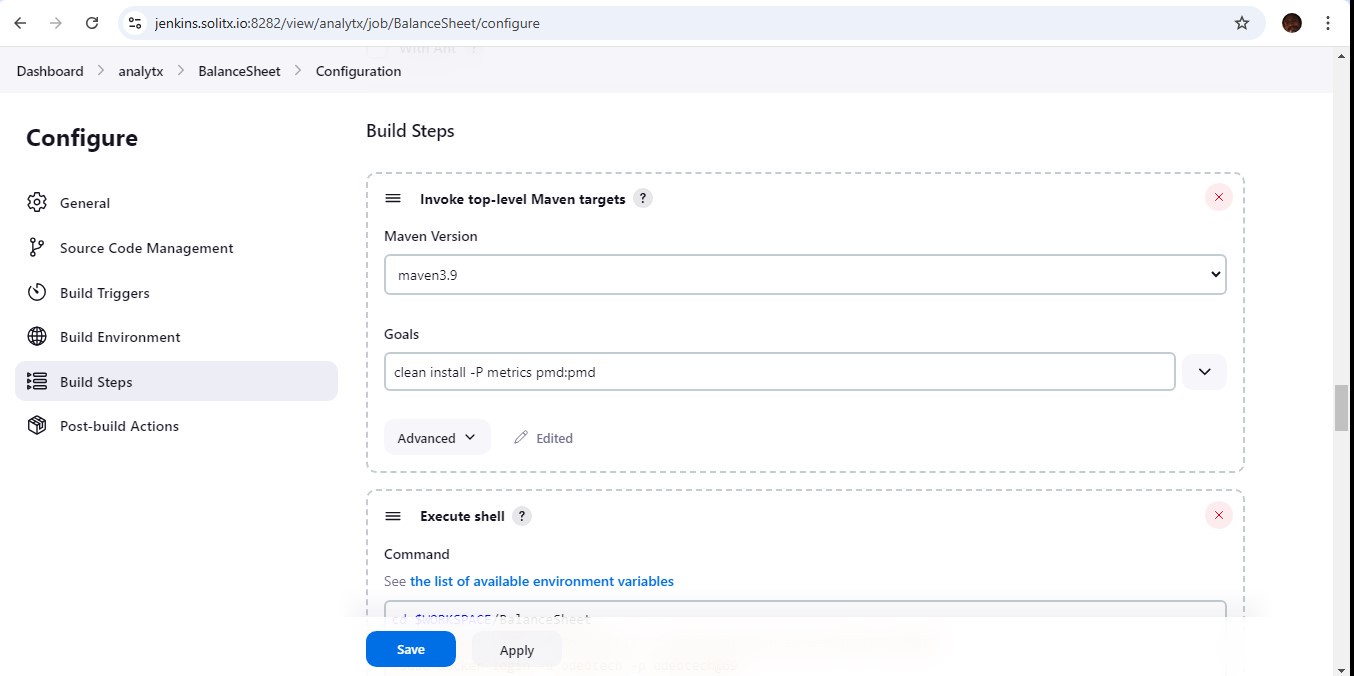
5.4. Build steps
-
Build steps are the individual tasks that make up a build process. Each build step performs a specific function, such as compiling code, running tests, packaging the application, or deploying to a server.
-
Steps to configure build steps
-
Click on
Add build step. -
Select
Invoke top-level Maven targetsfrom the dropdown menu and select the required maven versions and goals.
-
-
Click on
Add build step.-
Select
Execute shellfrom the dropdown menu. -
In the text box, enter the shell command that wants to be run.
-
Optionally configure things like whether to capture environment variables or fail the build if the command fails.
-

-
Click
Saveto save the configuration.
5.5. Post build actions
-
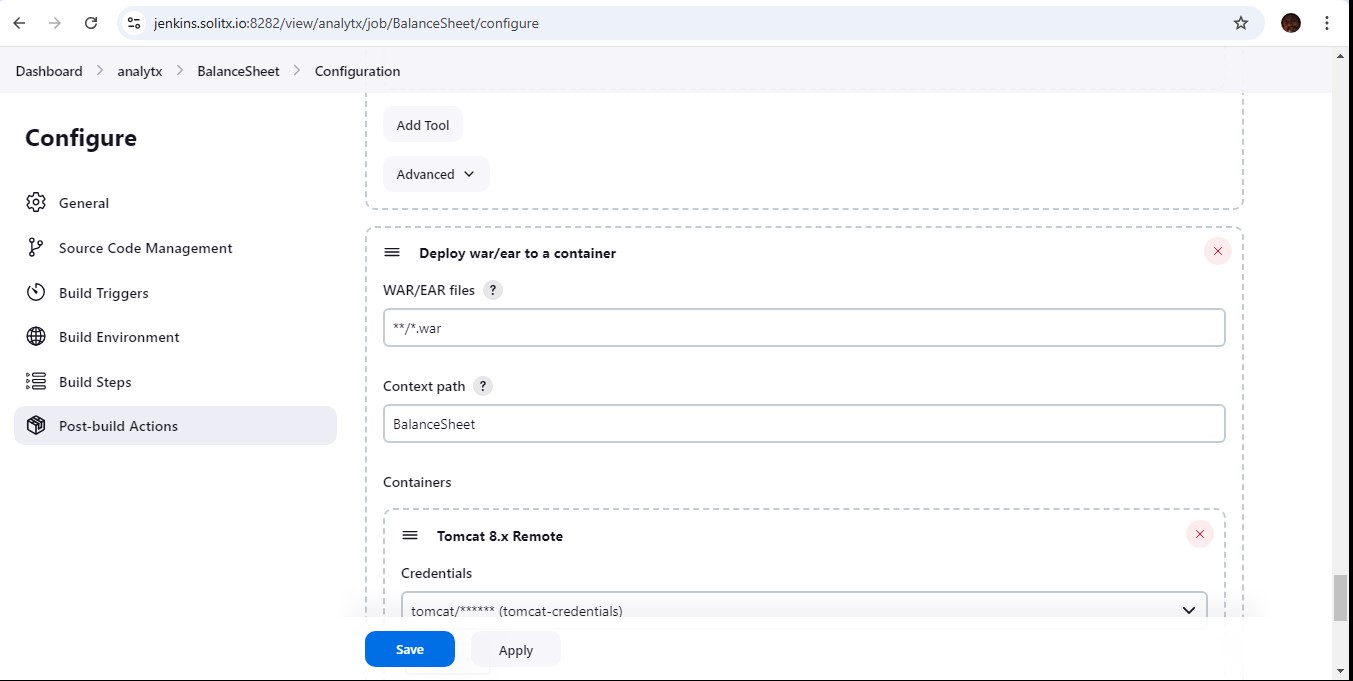
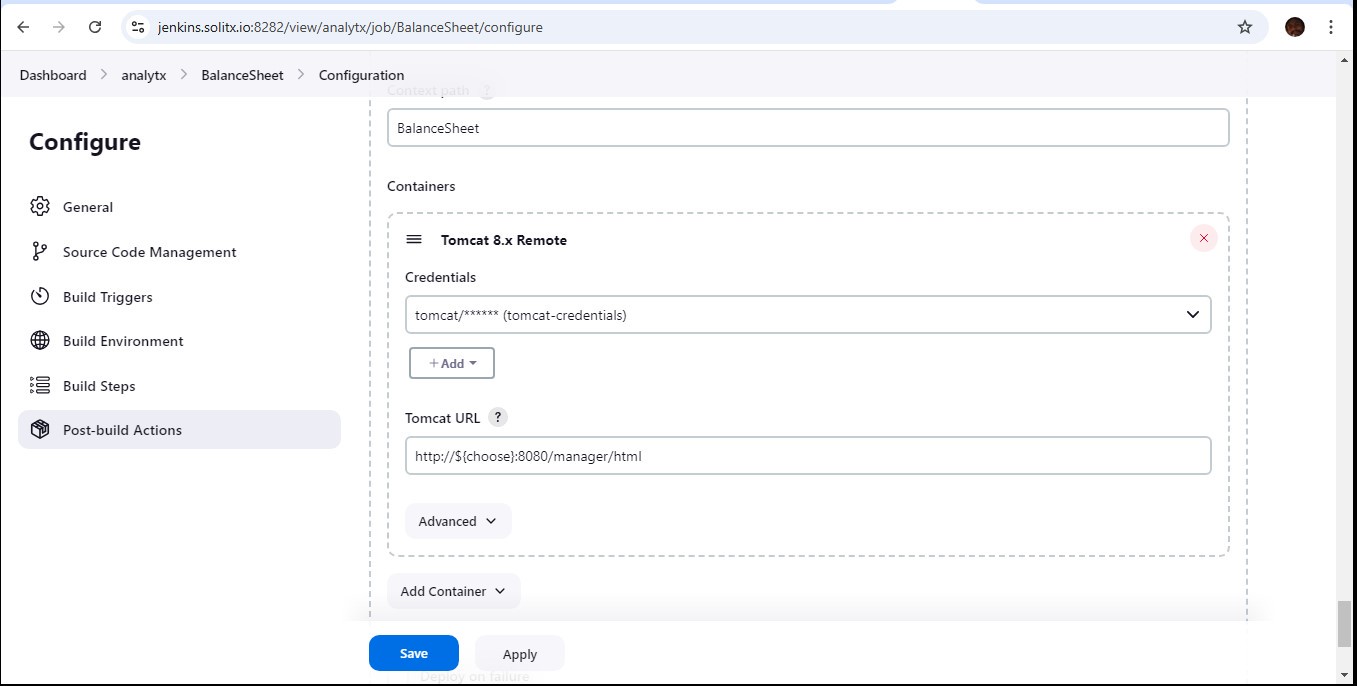
Steps to deploy war file to a container
-
Scroll down to the
Post-build Actionssection. -
From the list of available actions, choose
Deploy war/ear to a container.
-
-
In the
Tomcat 8.x Remotesection, add the server URL and it’s credentials.
-
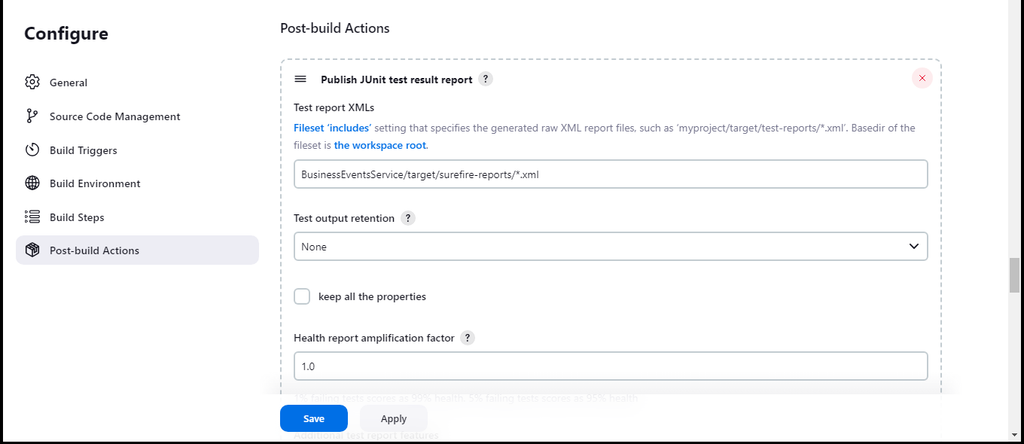
Post-build actions in Jenkins are automated tasks that execute after a build job completes. These actions allows us to perform various tasks depending on the build’s outcome (success, failure, unstable) or simply as a final step in the build pipeline.
-
Steps to configure post-build actions (Publish JUnit test result report).
-
Scroll down to the
Post-build Actionssection. -
From the list of available actions, choose
Publish JUnit test result report. -
In the
Test report XMLsfield, specify the path to the JUnit test report files using the Ant glob syntax (similar to wildcard patterns). This pattern will match all JUnit XML files with the .xml extension located within sub-directories of target/surefire-reports (assuming that’s where the test reports are generated). -
Click the
Savebutton at the bottom of the configuration page.
-
-
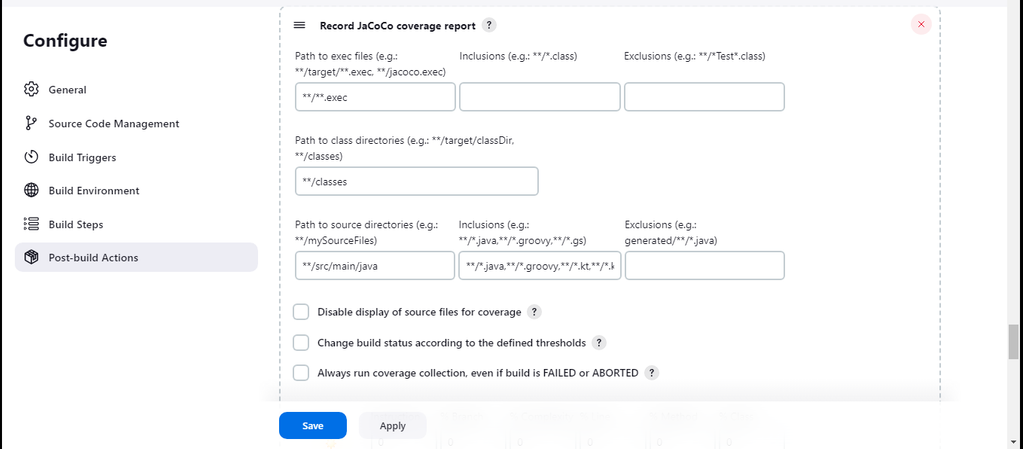
Steps to configure post-build actions ( Record JaCoCo coverage report ).
-
Select the Record
JaCoCo coverage reportaction. -
Specify the path for JaCoCo execution data files.
-
These are typically generated during the build process and have a .exec extension ( e.g., target/jacoco.exec ). Use Ant path patterns for flexibility ( e.g., */target/.exec ).
-
Define the path to the compiled class files. This helps JaCoCo map the execution data to the source code (e.g., target/classes ).
-
Optionally specify the location of the source code files (e..g., src/main/java ). This allows JaCoCo to display line numbers and source code snippets in the report.
-
Optionally provide an Ant path pattern to exclude specific source files or directories from the coverage report.
-
Click the
Savebutton to apply the configuration.
-
-
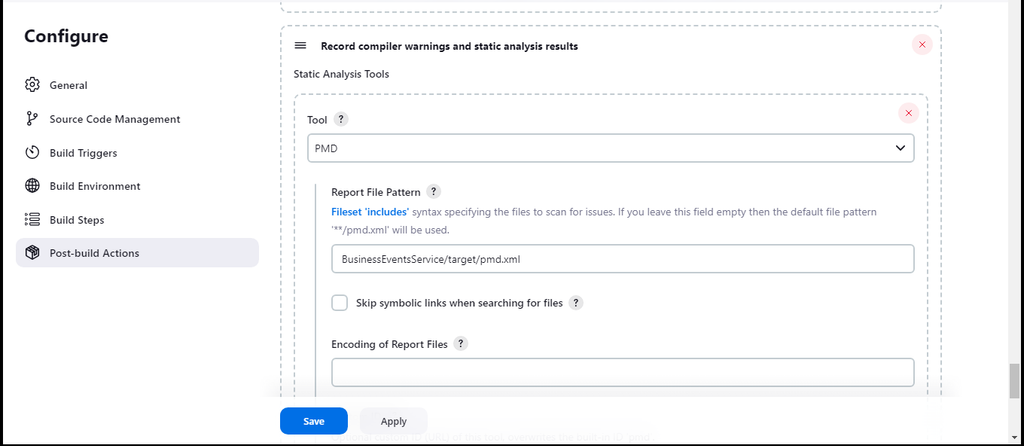
Steps to configure post-build actions ( Record compiler warnings and static analysis report ).
-
Select the
Record compiler warnings and static analysis results. -
Click the question mark icon (?) next to "Tool."
-
Select the tool from the dropdown list ( e.g., C++ compiler, static analysis tool, PMD ).
-
By default, the plugin searches for files named pmd.xml. If the reports use a different filename pattern, enter it here using Ant glob syntax (e.g., */target/.xml to match all XML reports in the "target" sub-directory ).
-
Click the
Savebutton at the bottom of the configuration page.
-